
Print product labels from WooCommerce
Open the BarcodeMan workspace from WordPress, select WooCommerce products and variations, set a quantity for each, check the template and paper size, generate the PDF and print it on sheets or rolls.
On this page
Once your site is connected, printing a batch of product labels is a short loop: open the workspace from WordPress, pick the variations, set quantities, check the template, generate the PDF, print it. This article follows that loop.
You need a saved label template before you start. If you do not have one, create it under Templates in the workspace; see Create your first template. If your barcode element is linked to the SKU, the variations you print also need SKUs; see SKU and barcode generator.

1. Open the workspace from WordPress
In your WordPress admin, go to WooCommerce > Barcode Man and click Open workspace. BarcodeMan opens in a new browser tab. If you are asked to sign in, use the Gookit account that connected the site.
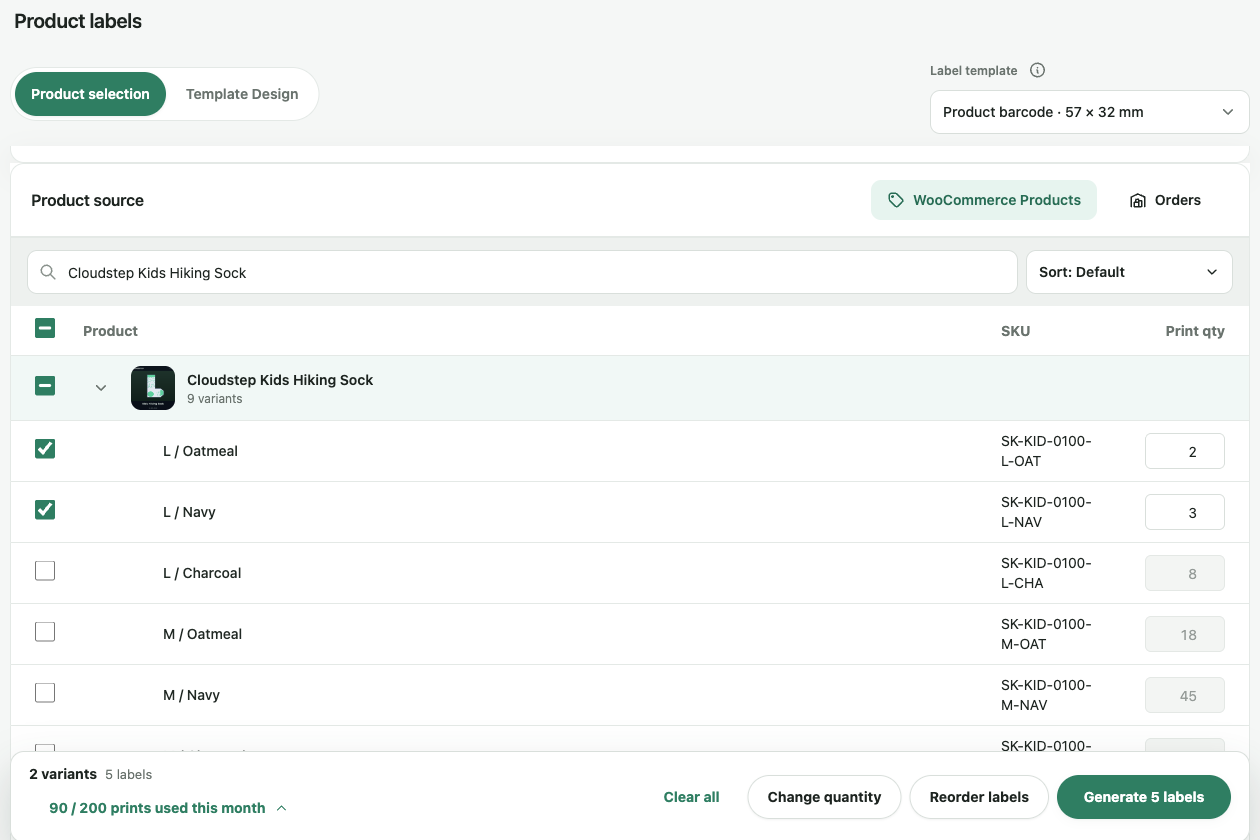
In the workspace sidebar, under Print, click Product labels. The page has two tabs at the top, Product selection and Template Design, and a Label template dropdown on the right.
2. Select the variations to label
Under Product source, keep WooCommerce Products selected (the Orders source builds a list from order lines instead). Search for a product by name.
A variable product appears as one row with a count of its variations. Expand it to see each variation with its SKU. Tick the variations you want to print; each one becomes its own label, so sizes and colours are easy to tell apart. Ticking the product row selects all of its variations at once.
The footer at the bottom of the page keeps count: for example 2 variants, 5 labels. Clear all empties the selection.
3. Set a quantity for each
Each selected row has a Print qty field. Type the number of labels you want for that variation; the footer total updates as you go.
To give the same number to several rows, tick them and click Change quantity in the footer, enter a quantity for the selected variants and click Apply. Reorder labels lets you change the order in which they appear in the PDF.
4. Check the template and paper size
The Label template dropdown at the top right shows which saved template will be used. Pick a different one if needed.
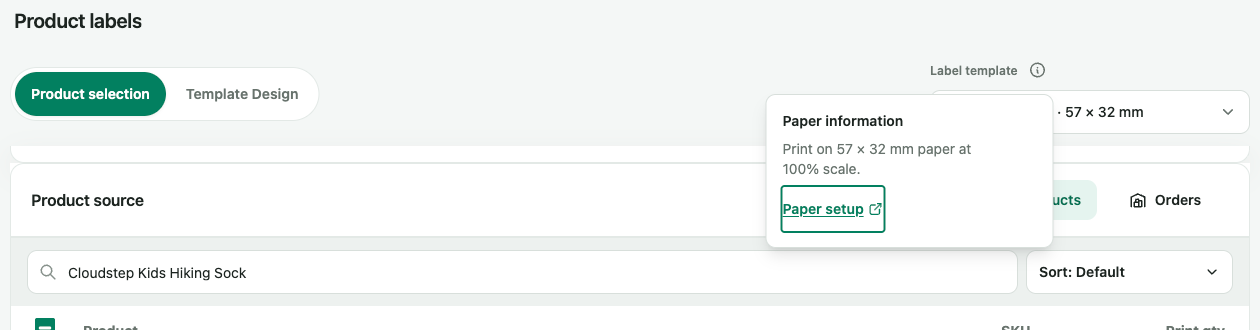
Click the info icon beside Label template to open the Paper information popover. It states the paper size and scale the PDF is built for, such as Print on 57 × 32 mm paper at 100% scale, and links to Paper setup for the printer-side settings. If this does not match the labels in your printer, change the template or its paper settings before generating; see Choose a template type for your label paper.
5. Preview the labels
Click the Template Design tab. With Previewing active, the Label Preview drawer on the right shows one card per selected variation, filled with that variation’s data and marked with its quantity (for example ×3). This is the quickest place to catch a wrong SKU, a truncated name or a barcode that is not what you expected.
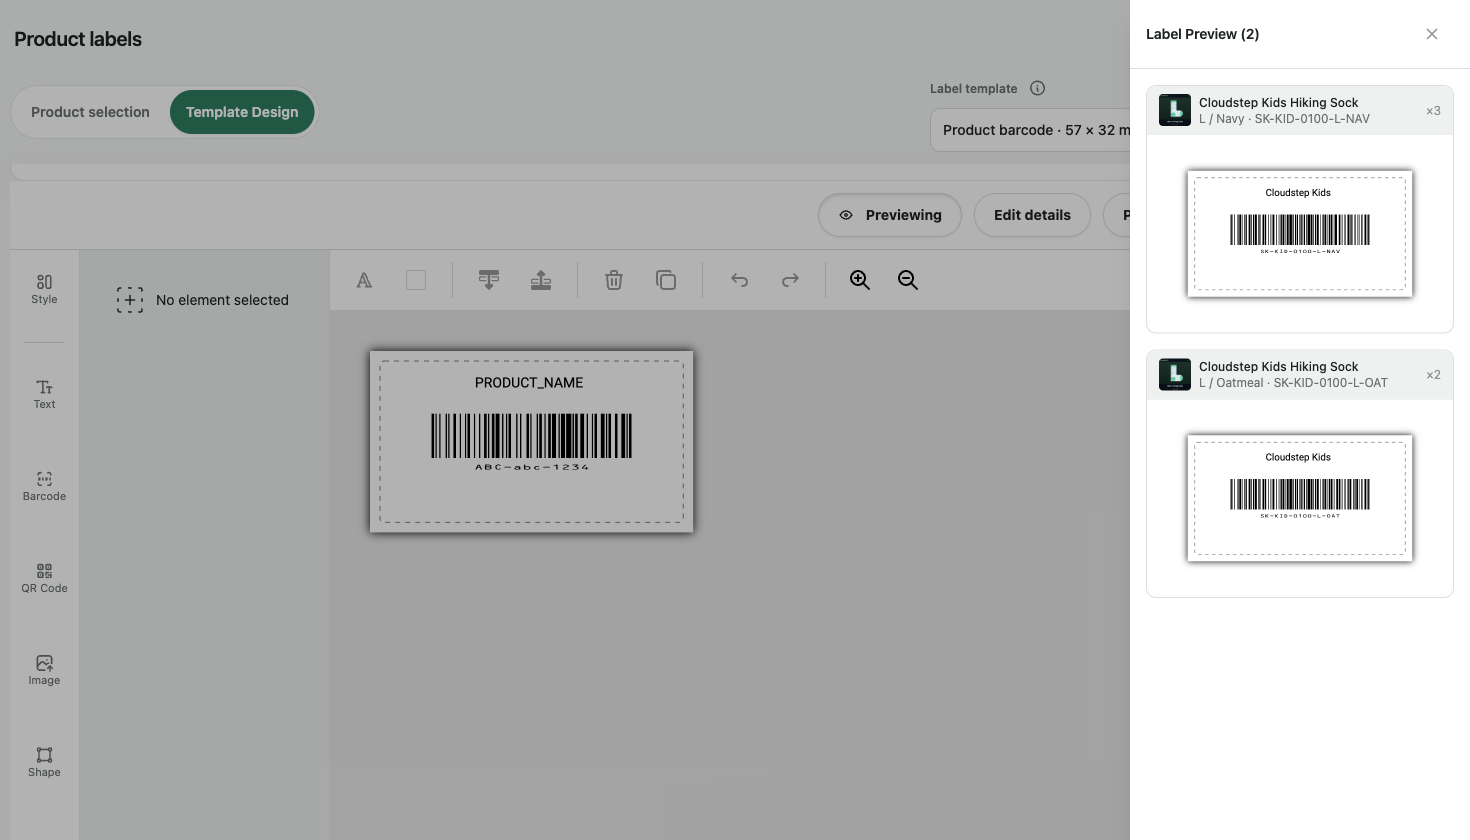
If a card looks wrong, fix the template element or the product data first. You can edit the template here and save it; the preview updates.
6. Generate the PDF
Click Generate N labels in the footer (the button shows your current total). A dialog titled Generate N labels for M products opens with a PDF print settings box listing Paper size, Margins and Scale. These are the values to use in your browser’s print dialog later.
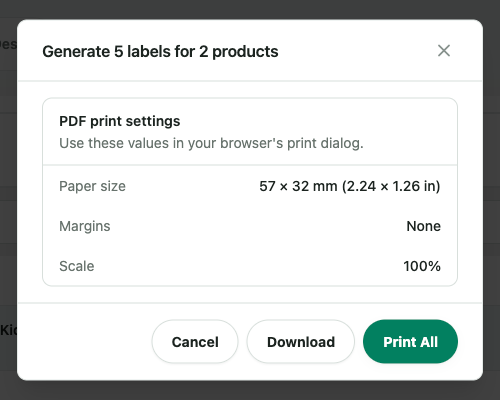
- Download generates the PDF and offers it as a file. This is the predictable choice on any browser.
- Print All generates the PDF and tries to open it straight into your browser’s print dialog. If nothing opens, your browser blocked the pop-up; see Browser blocks pop-up window when printing. You can always download instead.
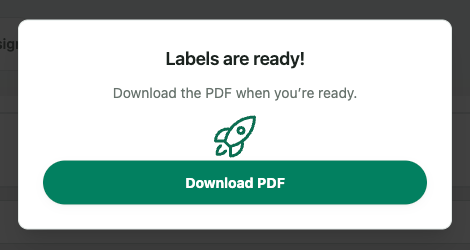
After a moment, Labels are ready! appears. Click Download PDF.
Generating never changes your WooCommerce products.
7. Print the PDF
Open the downloaded PDF and print it with the paper size from PDF print settings, scale at 100% or Actual size, and no extra margins. Print one sheet or a short run first and hold it against your label stock before printing the whole batch.
- For label sheets on A4 or US Letter, see Print the entire page in A4 or Letter size.
- For roll printers such as Dymo, Brother, Zebra or Rollo, and for the browser print-dialog settings by operating system, see Printer setup.
Your monthly label allowance
On the Free plan, BarcodeMan counts the labels you generate each month. The footer of Product labels shows the running total, for example 90 / 200 prints used this month, and the counter resets on the first day of each month (UTC). A batch that would exceed what is left in the month is refused before anything is generated, with a message telling you so; your selection and quantities are kept. Pro removes the monthly limit. Blank positions you skip at the start of a sheet are not counted.
Plans and current allowances are listed on BarcodeMan pricing; to change plan, open Settings in the workspace and click Manage subscription. See also Subscription and pricing.
If something is missing from the list
- A variation is not listed. Only variations that exist in WooCommerce appear. Check the product in WooCommerce and reload the workspace.
- The SKU column is empty for some rows. Those variations have no SKU in WooCommerce. If your barcode uses the SKU, generate one first with the SKU generator; nothing is saved to WooCommerce until you confirm.
- Generation stops with an error naming a variation. The variation was changed or deleted in WooCommerce after you selected it. Remove it from the selection and generate again.
- The barcode in the preview is wrong. Barcodes read WooCommerce’s GTIN/UPC/EAN/ISBN field for the product or variation and keep leading zeros. Check that field, or link the barcode element to the SKU instead; see WooCommerce SKUs and barcodes and Link To data binding.
Questions about this article? Email our team.
Send feedback